|
This post contains affiliate links. I'll be compensated for purchases made through those links at no additional cost to you. All views expressed are my own. Thanks for your support!
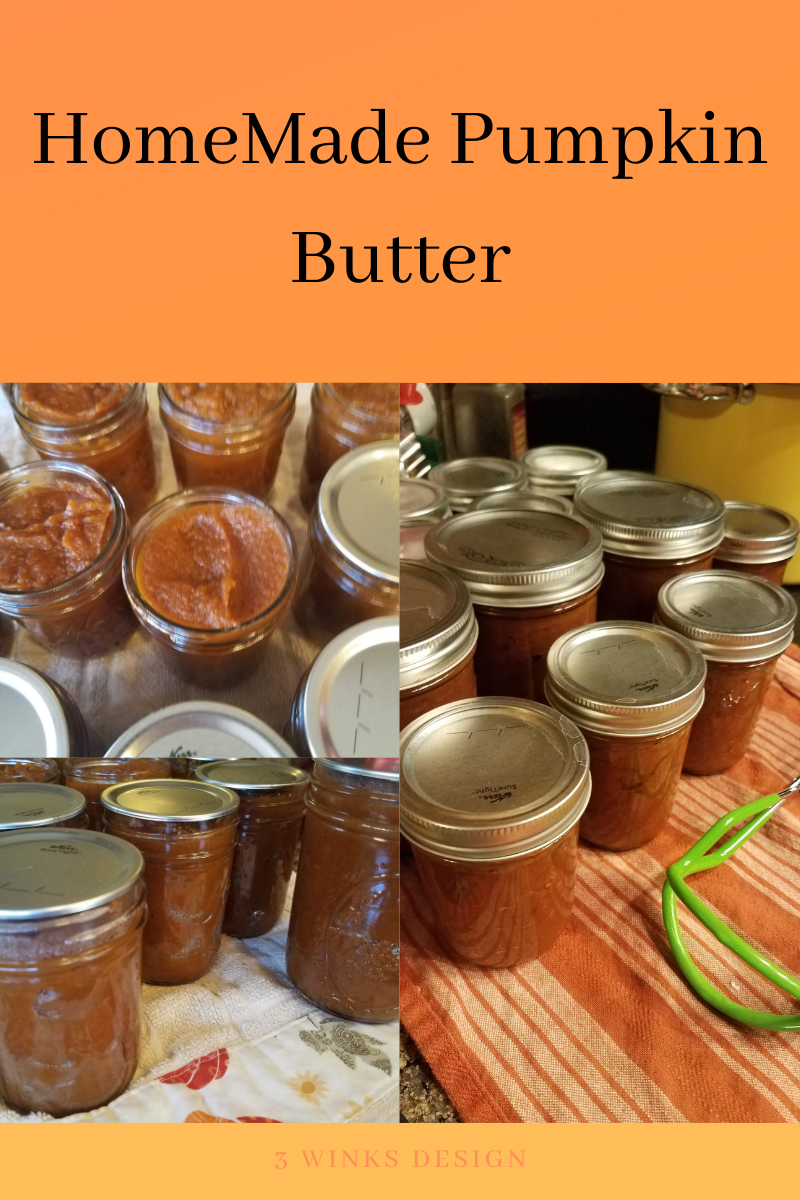
I am back with another pumpkin recipe! Instead of cookies I'm showing you how to make delicious pumpkin butter to spread on your toast or bagels. My daughter has been enjoying pumpkin butter with her peanut butter sandwiches!
This pumpkin butter is really easy to make and is so delicious. Now, I canned my pumpkin butter, but I want to give a disclaimer about canning pumpkin butter. If you get on to the website for the National Center for Home Food Preservation they discourage canning pumpkin puree, and only using pressure canning for cubed pumpkin. They say the problem is that due to pumpkin's low acidity you can't keep it from going bad. However, I have read on other sites that as long as the internal temperature of the pumpkin butter reaches 248 degrees Fahrenheit you'll be ok. It's up to you. I canned my pumpkin butter using a water bath method. I boiled the pumpkin butter for 1 hour and listed to them all seal shut (it's my favorite canning sound.) If you don't feel comfortable canning the pumpkin butter, you can just fill you jars and freeze them. I actually canned AND froze mine because I made a lot of pumpkin butter and want to give jars to people so I canned them and then froze them so that when I gift the pumpkin butter later I can advise them of what I've done, while ensuring the pumpkin butter's safety when I give it as a gift. Ok, so this pumpkin butter recipe is for the crock pot. It is so easy. You dump your ingredients in, stir them together, set it for about 3 hours on high, and then stir it up. Then your pumpkin butter will be ready for canning (or freezing!) Pumpkin butter is the perfect fall jam. It goes great on everything. Mix some pumpkin butter into your oatmeal in the morning. Then enjoy it with a cup of hot chocolate, preferably our pumpkin spice hot cocoa bomb. Doesn't that just sound like the best fall morning?
2 Comments
This post contains affiliate links and I will be compensated if you make a purchase after clicking on my links.

I was able to get a good deal on some boxes of peaches and pears from Utah! So, this past week Lindsey, Maddy, my friend Betty and I did some canning at Lindsey's house. We did the peaches on one day and the pears 2 days later. We caught them both at their optimum ripeness!
I've already shared with you how to can peaches on this post. But, I want to share a couple of new things we did this time around. I've been canning for a long time, but this dog can always learn new tricks!
Every year, when I start to can something, I always refer to the National Center for Home Food Preparation, or NCHFP, to find out if there have been any changes or new developments in canning safety. Sure enough, this time there were some changes that I want to make you aware of before giving you my recipe for delicious Spiced Pears!
First of all, they have found that white fleshed peaches are not safe to can! White fleshed peaches are not acidic enough for water bath canning nor is there a method for pressure canning them. The best way to preserve them is to freeze them! Luckily our peaches were yellow! Secondly, and I don't know if I just overlooked this before, but the site mentions that Hot packing peaches and pears will give you a better product than raw packing them... Now that one was a shocker to me because my raw packed peaches have always been delicious! From what I learned upon researching that assertion, the problem they have found is that the fruit shrinks during the processing in the water bath. This causes them to rise up tightly in the jar leaving a lot of liquid at the bottom. Then, when the fruit falls, the liquid may not cover all of the fruit and the part of the fruit not covered can turn brown, although it is still safe to eat. Hmmm... So, we decided to test out this idea when we canned our peaches.
Hot Pack Process
The Hot Pack process involves making your light syrup as usual but then adding the fruit to it and allowing it to come to a boil all together before adding the fruit and liquid to the jars. Then, leaving a 1/2 to 1 inch headspace and removing the bubbles, add the lids and process as usual.
To test this out, we did our sliced peaches the hot pack way. But, we noticed that there still was lift as the jars were sealed, but maybe not quite as much because we were able to fit more peaches into a jar. Then, I did some quarts of peach halves and then made sure that I really packed them in. Also, I carefully measured the headspace, removed the bubbles and added more boiling syrup as needed. By being more precise, I didn't notice a big difference in the amount of lift in my raw pack jars to my hot pack jars. So, frankly, I am probably going to stick with my raw pack method because it is easier, but be more careful to pack tightly, measure headspace carefully and to get those bubbles out.

Now Let's Talk About Canning Pears!
The process of canning pears is a bit simpler than peaches because you don't have to blanch them first to get the skins off. You can simply peel them with a potato peeler! It was so great having many hands doing the work together because one of us peeled, one of us sliced and cored and one of us filled the jars and kept an eye on the syrup and everything else! (We had 3 people working each day as Betty and Maddy came one day each!)
After our experience with hot packing the peaches, we decided to stick with raw packing the pears. As you can see in the picture above, there wasn't a lot of lift after the jars were processed. I made sure to :

Spiced Pears!
While I was doing research about the hot pack, raw pack thing, I kept seeing ways to add other ingredients to your peaches and pears when you can them. One thing I saw was cinnamon sticks and whole cloves in the pear jars and I thought that they looked pretty! I decided to try it with a few of our jars just to see how they turned out.

We took this photo right after the jars were out of the canner. Don't worry, they all sealed a few minutes later. I just wanted to show you the cinnamon stick and whole cloves in the jars.
Honestly, I was just guessing on the amount of spice to add to the jar. I didn't add any additional spices to the syrup. I was concerned that the spice taste wouldn't come through. But, I was wrong! These pears are so delicious! They taste just like Fall and I wish that I had done all of the jars like this! I am tempted to buy more pears just to be able to can more spiced ones! These are the type of things that make canning so enjoyable!

What a simple change and now these are my favorite canned fruit of all time I think. I know you will love them too!
Check out these other canning recipes and tips:
This post contains affiliate links. I will be compensated for purchased made through those links at no additional cost to you. All views expressed are my own. Thank you for your support!  Fresh corn on the cob is one of the joys of summer produce! What is a summer barbecue without corn on the cob? And if you grow it yourself, it is even better! I didn't grow corn in my garden this year, but I did find a really good price accidentally in the grocery store, so I decided to take advantage of it and can some to enjoy later in the year. If you are a gardener with a bumper crop of corn that you want to preserve, you are going to love this Corn Salsa recipe. It is brightly flavored with that south of the border flavor that goes so well on so many things. My favorite combo is with chicken tacos. Maddy used it straight out of my pot on her vegan bean tacos! She pronounced the salsa delicious!  Another great thing about this corn salsa is that it is quick to preserve! You can process the pint jars for 15 minutes in a water bath canner rather than the pressure canner because of the lemon and lime juices that are used in the recipe. *Here is a tip from the National Center for Home Food Preservation: Always use lemon juice that has been bottled commercially because only then can you be sure that the acidity is at the correct level to safely preserve food. The great thing about using lemon juice is that it adds to the brightness and flavor of the recipe rather than detracting from it like vinegar can. This recipe contains both lemon and lime juice. Lime juice is so traditional with Mexican Food. The flavor of the lime really comes through in this corn salsa recipe. People have told me that they don't enjoy canning corn because they don't enjoy the mess of cutting the corn off of the cob. I found an answer to that problem in a Fry's Food (Kroger) magazine that is an easy way to cut the corn off the cob with less mess and without the corn cob slipping around as you cut. I think that you can only get this magazine if you have a Kroger shopping card. I tried to find a link to the store magazine but couldn't find one. So, I used their method for cutting the corn off of the cob and took pictures to show you how it worked. Click on the photos for instructions. *Tip for cutting corn from the cob with less mess and slipping! Wasn't that easy? I had zero little kernels to clean up off of the floor when I was finished! After cutting the corn off of the cob, all I had to do was dump it into a big pot with the rest of the ingredients and cook as directed.  As you can see, I used quartered cherry tomatoes in this batch of salsa. You can use any kind of tomato that you have, but you may want to peel larger ones. You could also add hotter peppers if you like more heat, or bell peppers for the flavor. While the corn salsa simmers, get your jars and lids ready, as well as your water bath canner. I decided to can pints, so I used my smaller pint canner. I like having both a quart canner and a smaller pint canner mainly because sometimes I can have them both going at once! Also, the pint canner takes less water so it comes to a boil more quickly and (obviously) saves on water use. Of course, if you want to do more than 7 pints at a time, you can put more jars in the larger canner. It is all up to your own preference.  Once your Fresh Corn Salsa comes out of the canner, has sealed and is cool, you need to label it so that you will use it in a timely manner. It is probably best used within the year, before the next crop of corn comes on the stalk! I have mentioned before that I don't like labeling my jars themselves because it is such a pain getting the sticky label off the jar when you want to reuse it for something else. That is why I usually write on the lid. But, sometimes I want a cuter solution. Also, sometimes writing on the lid doesn't show as well as it does on a label. So, I have created some labels that fit on the jar lid that you can print and easily write the name of the contents in the jar and the date they were canned!  This label will easily fit on both wide mouth or regular mouth jars.  There is a space for your name, the contents and the date. These labels are made to print on Avery labels 94501. I ordered mine from their website. You can click the button below and print them out for yourself!  I printed up these labels just in time because tonight I am picking up a case of peaches to can! I'll be putting them to good use! Have you done much canning lately? I hope you can give this corn salsa a try! Happy Canning! Other canning posts you might enjoy!
This post contains affiliate links. I will be compensated for purchases made through those links at no additional cost to you. All views expressed are my own. Thank you for your support! It is always fun to go out to the garden and find the fruits of your labor. With zucchini, it never ceases to amaze me how well those buggers can hide. Just when you think you are staying on top of picking the nice, tender, normal sized version of the vegetable to cook for your dinner, suddenly there appears before your eyes the humongous monster zucchini that you hadn't seen until that very moment. This is the time of year when those of you who grow zucchini should be having it come out of your ears! This zucchini relish is one of our favorite ways to use those large harvests of zucchini and yellow summer squash. I actually put up this recipe a few years ago, but decided it was time to pull it back out for you with a bit of an update! I hope you enjoy it!  I learned from my Uncle Paul and his wife, Melba, how to make Zucchini Relish. It is actually a recipe Melba got as a girl in school. Uncle Paul used to make it by the gallons to give as gifts. My kids love it better than cucumber relish. It is a great way to use up all of those fabulous zucchini from your garden. As you can see by the picture above, We also mix in the yellow crook-neck squash as well. It adds a lot of pretty color to the jar. Here is the recipe.  Here are the other veggies that add to the color.  This recipe relies heavily on the food processor! Mine made fast work of all of that grating!  Here are all of the grated veggies combined! I think they look pretty! Mix all of the vegetables with the salt. Then cover and let stand for 5-24 hours. (I always do the 24 hours, or at least over night because after all that grating, I am ready for a break.)  The next day, use a large colander to drain and rinse the mixture well. (I don't own this one, but now that I see it, I want it!) Then, use a very large pot for the next part of the recipe. Click the pictures to see what was happening. Put the relish into pint jars, clean the rims and add the lids. Process in a water bath canner for 15 minutes. (Here is the kind I've used for years) All of that vinegar used in pickling means you don't need to pressure can this recipe! Remove from the canner and allow the jars to cool and listen for the pop that to signify the sealing of the lids! If you have any left over relish in the pan, put it in a bowl in the fridge to use first! As you can see, I also used some quart jars. These will need to be processed longer. Process them for 25 minutes. Now, all you have to do is grill up some dogs or brats and enjoy your relish! You will love it. When it comes to large bowls, I have always relied on my huge Tupperware bowls when I need something that will hold a lot! This one holds 32 cups!  |
Creators of Hot Cocoa Bombs! (copyrighted)

Author
Helen Reynolds: Mother of six children , grandmother to eleven! I love to cook, craft and create things and I especially love doing that with my family, So, when my lawyer daughter, Lindsey, my artist daughter, Madalynn, and I came up with the idea of Hot Cocoa Bombs, this blog was born. Then, one more daughter, with her technical and science skills, plus creativity has joined in to round us out! Read more about us here! 
Click this link and visit 3WinksDesignShop on Etsy. Find our Hot Cocoa Bomb Idea Book, our For the Love of PIe e-book and more of our creations!

Amazon Gift Cards are the Perfect Gift!
    Archives
June 2024
|


 RSS Feed