|
This post contains affiliate links. I will be compensated if you purchase anything through my links. Thank you for your support!
I'm not sure if I'm doing pregnancy cravings right. Are you supposed to be desperate for whatever you're craving? Because for me its more like I think about my cravings more often than not, and if someone suggests it then I am never opposed to having it.
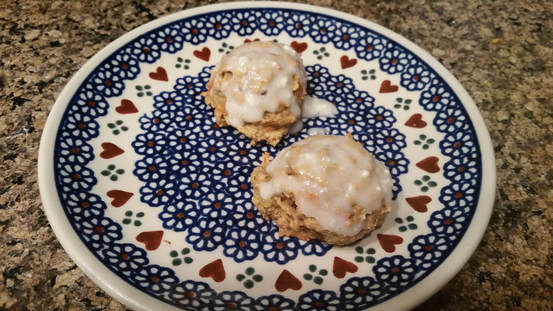
Well, regardless, I have been thinking about Carrot Cake a lot. It sounds so good to me right now. Carroty, sweet, with cream cheese frosting. You can't go wrong with a good carrot cake. I can't eat carrot cake all day every day though, because, well, health and all that. So, while I find absolutely nothing wrong with giving in to my cravings from time to time, I decided I needed a healthier alternative that would satisfy my need without leaving me on a diet of cake. So, I decided to experiment last night to come up with a health(ier) alternative for carrot cake, and I settled on carrot cake cookies. 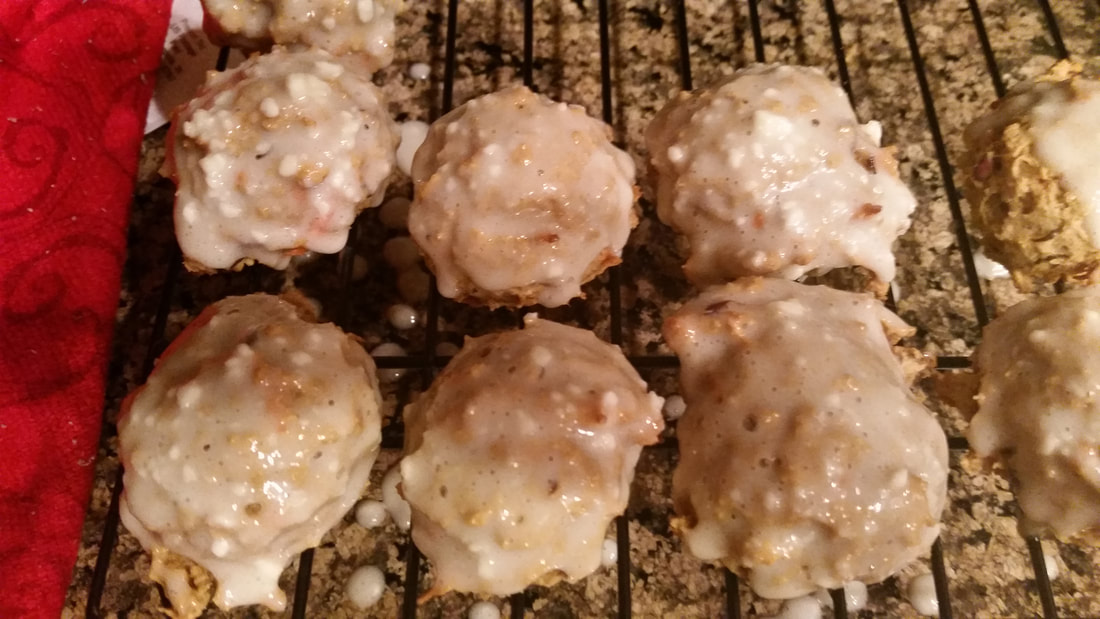
To be honest with you, these cookies were not perfection to me. I feel like they need a little more tweaking for me to get ratios and flavors just right. So, it's become my new pet project and when I am finished I will share the perfected recipe with you. I will say however, it was a valiant first attempt. PH ate four of them! He thought they were great! He asked me at one point, "you made these all healthy right?" Then went back into the kitchen to snatch another one. So, that made me really happy!
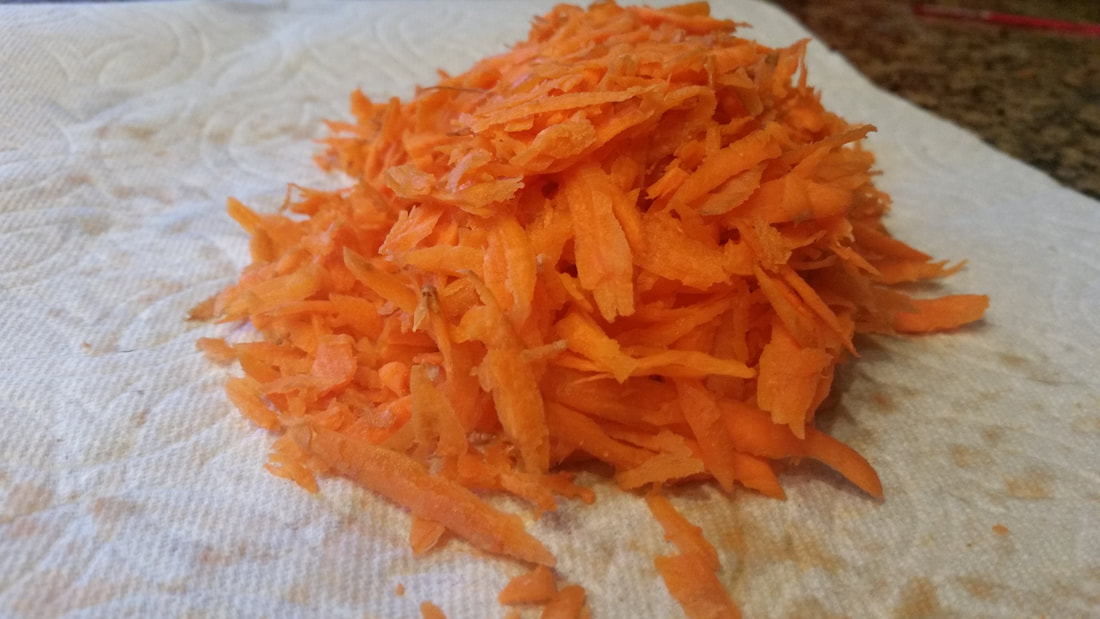
One thing PH did note was that it tasted more like pumpkin to him instead of carrot. I don't agree abut the pumpkin (there was no pumpkin in this cookie, although, I might do a carrot cake pumpkin variation in the future) but I did put cinnamon and even a dash of nutmeg in, which probably made him think of pumpkin. I also grated an apple and put that in too. Thanks to the sweetness of the apple I used less sugar. I also switched out the sugar and used honey instead. Honey is so great and so good for you! I threw in some oats, but I think for me it wasn't carroty enough. I didn't feel like I was eating a tiny carrot cake. Also, I think I need a better balance between the oats and the flour. I did glaze them with cream cheese frosting. Instead of the thick frosting you normally find on carrot cake I did a thin glaze for these cookies. I did test them by themselves though because I want them to stand on their own so you can have them without the frosting for an even healthier alternative. So, come along with me on this journey while I find the perfect healthy carrot cake cookie that all the pregnant ladies can eat without guilt (also, non-pregnant people should be able to enjoy them as well!)
1 Comment
This post contains affiliate ads. I may be compensated if you purchase through any of our links. Thanks for your support!
The other day when I went to the grocery store I saw that strawberries were on sale, 88 cents a pound! I bought a LOT of strawberries. I love a good strawberry, and it was perfect for the strawberry spinach salad I was going to make for dinner that weekend.
However, I had several pounds of strawberries, and PH and I are only two people. I didn't want them to go bad, and so I was planning on building our food storage with them. I have a lot of fruit and veggies that I've frozen to have on hand when necessary, but this time around, I decided I wanted to try my hand at canning. My mom has talked to you about canning a few times on this blog. I remember growing up all the canning she would do. She'd make different types of jams, and she'd can various fruits and veggies, and even meat! You may remember this post where she told you how to can peaches using a water bath. She also gave you some jam canning tips (including strawberry jam!) here and here. My mom is kind of a canning pro, and since I have never canned anything before in my life, I asked her if she'd come help me make some strawberry jam! She came over, and we decided to do something a little different this time and film the process for you to watch and enjoy! Check out our videos below.
Now I have to step in here and let you know that this is where we had some technical difficulties with our camera and had to switch to a different one. Unfortunately, by the time we realized our camera wasn't filming we had missed a few crucial steps. The main one being that once the jam was boiling after the pectin and butter were added we added the sugar. A few tips from my mom. The recipe calls for A LOT of sugar (seven cups!) You can make a low sugar variety of jam, but you have to use a special pectin or it won't work. Since we had regular pectin, we had to use all the sugar. The second thing about the sugar is, you have to add it all at once. I measured all seven cups into a large bowl and when my mom told me it was time to pour in the sugar then I poured it all in at once.
We kept stirring continuously until the jam came back up to a rolling boil. Then we turned the head off. All while cooking our strawberry jam our jars were sterilizing. We filled the jars up with boiling water, and we put the lids in a bowl and covered them with boiling water as well. That water also helps the lids to soften so they'll be ready to seal once your jars are filled. Once you turn the heat off you'll see some foam in your pot. Mom took a regular spoon to skim that foam off the top. She put it in a separate bowl. There is nothing wrong with the foam, but when it cools it kind of looks like a hardened skin and isn't very pretty inside the jars. So just use a spoon to skim around the top and get all the white foam out. She also saves the bowl because at the end there is always a little extra jam that you can pour into the bowl and you can use it right away. It gets you started on enjoying your jam! Okay, continue onward now that you know the rules about the sugar and the foam!
Making my own jam and canning it was a lot of fun, and actually much easier than I thought! This recipe we used used up three pounds of strawberries. So I actually have three more pounds that I intend to use to make even more jam this weekend! It's exciting to be able to do something that helps build our food storage, and it was a fun little project to do with my mom! So get together and make some strawberry jam!
This post contains affiliates and I may be compensated if you buy from our links. Thank you for your support.

Remember this post? I told you my favorite campfire food is peach cobbler. Growing up, whenever we went camping it was a given that my mom would make cobbler one night, and it was a given that it would be peach cobbler.
The wonder of peach cobbler is that it is so easy. Canned peaches, butter, cake mix, and sugar. Rip, dump, bake. Then you can top that heavenly concoction with ice cream and there is basically nothing on this earth that is better than that. Well I guess after that post, PH and I both had cobbler on the brain. I told him last night that I still needed to make something for the blog this week, and he said I should make peach cobbler. Well, first he looked at the grocery store ad and saw that peaches were on sale. THEN he said I should make peach cobbler. I had my doubt about making cobbler with peaches purchased that very night, but I agreed and off to the grocery store we went. 
White peaches WERE on sale and we bought five of them. I came home and sliced them up. They do look really beautiful, but I have to be honest, these peaches didn't taste very good to me. They weren't ripe enough. So I made my husband cobbler, and I stand by this recipe, but I urge to either, use canned peaches, or, wait until your peaches are ripe. Don't be like me. Don't wait until the last minute to decide what recipe you're going to blog about and then be stuck with not ripe peaches.
I will say though that PH had two servings of the cobbler and he told me he thought it was really good. I even assured him he didn't have to lie to me because I knew the peaches weren't ripe. He was adamant that it tasted better than I thought. So, there you go, to each his own. Maybe it's just my wacky pregnancy tastebuds, or the fact that normally I prefer yellow peaches in cobbler but the white ones were the ones on sale. Either way, I want to be honest with you. 
I do still stand by this recipe. You cannot go wrong with butter and cake mix. You really just can't. I used yellow cake mix, and I think that's the best. I have seen other recipes where you make your own topping but that feels wrong to me. Cobbler is supposed to have that cake mix topping taste, in my opinion. It meshes perfectly with the peach taste.
However, I started speculating about trying different peach cobbler recipes after making this. I think my lack of enthusiasm over my unripe peaches got the wheels turning in my head. So, that may be a new quest I embark on. To try out different cobbler recipes. Maybe after all this time I find I like it better without cake mix (but I doubt it.) So, do you feel like cobbler tonight? You should! Especially if you have ripe peaches, or canned peaches. 
Everything is made better with butter.
I am sorry I am so late with this post today, as well as skipping yesterday. It's been a rough one for me. If you've never been pregnant before never let anyone tell you how pregnancy is going to go. Nobody else has been you pregnant before, so, they really just don't know what they're talking about. Anyway, did you know that yesterday was National S'mores day? It's the day when we can all celebrate and enjoy that delicious camp fire treat of a roasted marshmallow, a chocolate bar, and some graham crackers. It's a tasty treat that has experienced a renaissance in the way it's built and presented. Here on our blog we have shared a s'mores variation known as Chocolate Dipped S'Mores Bars. You may also remember this post where we talked about our favorite Campfire Dishes and showed you a picture of the S'mores bar Alicia had at her wedding reception. We love getting together and roasting our marshmallows to perfection over the fire pit in my parent's backyard. I also have fond memories of camping as a child and making s'mores to enjoy over the fire.  Madalynn made this other fun variation on s'mores a while back and she is letting me share the how to with you. She used vegan marshmallows since she is trying very hard to eat vegan, but regular marshmallows will still work. She also used 86% dark chocolate and graham crackers without honey. In order to make it you first put the marshmallows on the stick, then coat in melted chocolate, and roll in the graham crackers. Then you freeze them. She also warns to refrigerate them before you serve them or they are really hard.  Here is a photo of everything she assembled to make it. She used very dark chocolate, but I'm sure you could use less dark if dark chocolate isn't your thing. (It's my thing, but it is not my mom's thing.) This is a fun variation to use if you don't have a fire pit in the backyard and can't take the time to go camping, but you still need a S'mores fix. Even though yesterday was National S'mores Day, it's not too late. You can make this fun and tasty treat this weekend and enjoy a delicious s'more!
|
Creators of Hot Cocoa Bombs! (copyrighted)

Author
Helen Reynolds: Mother of six children , grandmother to eleven! I love to cook, craft and create things and I especially love doing that with my family, So, when my lawyer daughter, Lindsey, my artist daughter, Madalynn, and I came up with the idea of Hot Cocoa Bombs, this blog was born. Then, one more daughter, with her technical and science skills, plus creativity has joined in to round us out! Read more about us here! 
Click this link and visit 3WinksDesignShop on Etsy. Find our Hot Cocoa Bomb Idea Book, our For the Love of PIe e-book and more of our creations!

Amazon Gift Cards are the Perfect Gift!
    Archives
July 2024
|
 RSS Feed