|
This post contains affiliate links. If you make a purchase after clicking them, we will be compensated, but there is no additional cost to you. All opinions expressed are our own. Thank you for your support   Hi everyone! It is that time again to make something giftable with our own hands here on Handmade Monthly. This kitchen scarf makes a perfect gift! How do I know? Because I received one as a gift and I love it! This isn't a scarf to wear in the kitchen to create a chic addition to your wardrobe, although these can be pretty cute. This scarf is so practical and absolutely genius! Of course, by dear friend Anita is the one who taught me about them and gave me one! Anita always comes up with and/or finds absolutely genius ideas. She also gave me permission to share this pattern with you.  You can see her in the collage, and here is my favorite picture of Lindsey modeling the kitchen scarf for you! Anita introduced me to these before Christmas, so I was able to make some for my sisters and some friends last Christmas. I am going to make more this year for the people that I missed. (Even though these are a quick project, I still couldn't get to everyone!) Here is the beauty of the kitchen scarf:
 Anita made this blue one for me. She knows I love blue. So, are you ready to get started on this sweet project? Just click the read more button to get the simple, detailed instructions.
22 Comments
This post contains affiliate links. If you make a purchase after clicking them, we will be compensated, but there is no additional cost to you. All opinions expressed are our own. Thank you for your support.  Well, last week's Friday Faves Favorite Things Party didn't have the overwhelming response I had hoped for. If you forgot about it or just didn't have time to comment, you still can and I will love you for it! One wonderful thing did come out of that party though. A fellow grandmother blogger, Nana Kelly at What's Nana Making, introduced me to a great fabric resource! The website is called Connecting Threads and I have fallen so in love with it that I have applied to be in their affiliate program. (I am not an affiliate yet, but Nana Kelly is, so that is her link to the site!) Connecting Threads is a site made for quilters, but of course you can use their fabrics for whatever projects you would like. Their prices are wonderful. If you are like me, I always head straight to the clearance section to shop first. Did you see those fabric samples in the collage above? They are all from the 30 PAGES of clearance fabric that are on Connecting Threads. The prices start at $ 2.79 per yard! Then, when you go to the regular fabric page, there are about 50 something collections of fabric. That means, in each collection there are groupings of fabric that coordinate with one another. This makes sense when you are selling to quilters and crafters. The regular prices start at a reasonable $4.19 per yard. All of the fabric I have looked at is 100% cotton and 44 inches wide. They also have flannel and Luxe fabrics. When you first sign onto the page, you get a 15% discount off of your first order! Besides fabric, Connecting Threads also has (obviously) thread at a great price and kits for a myriad of items. Here are some of my favorites. Click on the gallery to get a good view of them: So, check out What's Nana Making for some project ideas, or check out some of our projects here. Then go to Connecting Threads and get a great deal on needed supplies! You are going to love it! Thank you Nana Kelly for sharing with us!
Hey guys Alicia here with a DIY that is easy and fast!
As my due date approached for my second little one (who you met here) the realization hit me that we would have two kids in diapers, and not a lot of space for storage. We live in a very small home with very limited storage space (no closets!), so I needed something that would keep me from tripping over boxes of diapers. I looked online and saw these cute diaper stackers, they could hang from a door hook or on the side of a changing table. But they only hold around 60 diapers! We buy huge boxes of diapers, with at least 200 diapers in the smaller size so I knew I would need something bigger. They also weren’t machine washable. That’s when I came up with this idea of making my own diaper stacker from an old t-shirt. Because it’s from a t-shirt there’s very minimal sewing involved and it’s easy for a beginner 
DIY Hanging Diaper Stacker
Materials:
Instructions:
I was compensated for this post. This post also contains affiliate links and I will be compensated if you make a purchase after clicking on my links.
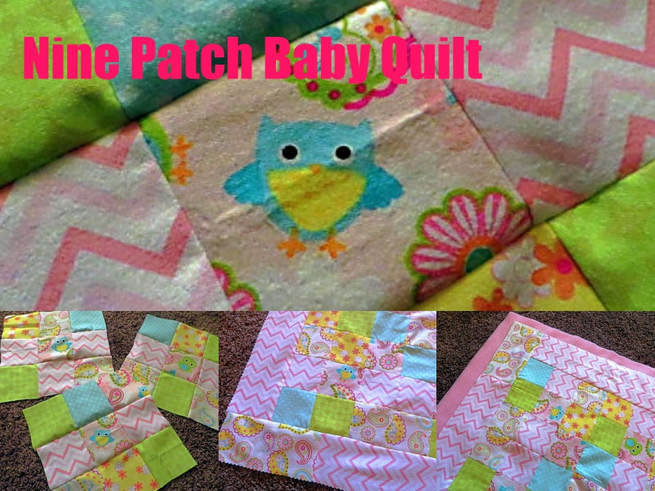
I am not a quilter really, I have taken a couple of classes and made a couple of quilts, but I am not good at it and I need simple patterns. And even though they are simple, I am not good at matching corners and points very well. But, since I have new granddaughters coming, and because I love fabric, I am trying my hand at quilting again. You may remember this quilt that I made for my grandson a couple of years ago. I decided to try a 9 patch for his baby sister!
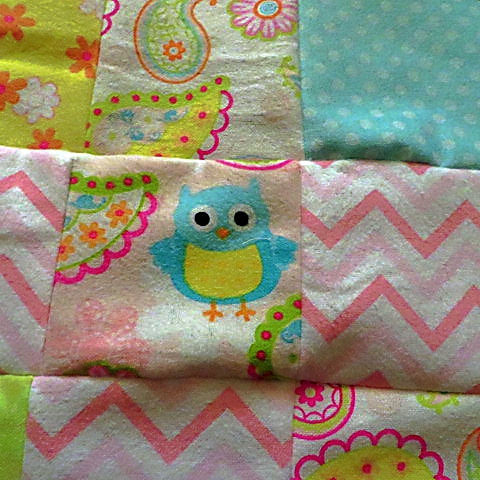
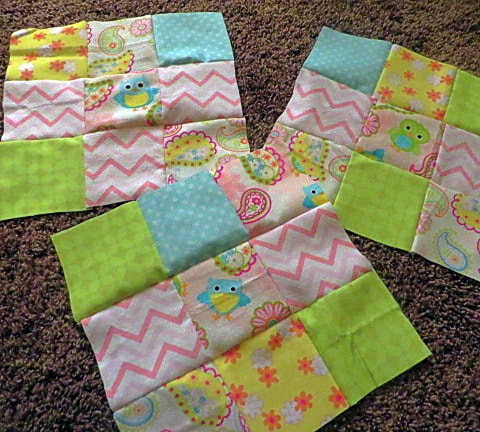
My mother is a quilter, and on my bed I have a quilt that she made for my husband and I that is a 9 patch. In the center of each block is a bird flying. I took inspiration from that quilt when I found some fat quarters at Walmart with owls in the mix! (That is a link to all of our owl themed posts!) I used 7 fabrics to make my blocks. I had to place a template over my owls to cut them into my squares. They don't all fall right in the middle, but that is okay. I used the rest of that fabric as one of the other colors as well. Here are how the blocks turned out. There were 3 different types of owls.
As you can see, the common thread in each block is the owls in the middle of the blocks and the pink zig-zag fabric on either side of the owl piece. I made 12 blocks. After I sewed the blocks together, I arranged them on the carpet into a pleasing pattern to my eye.
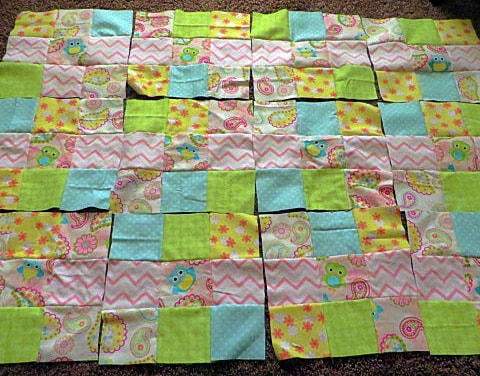
When sewing the blocks together, I felt it was important to make sure that the zig-zag pieces all faced the same way.
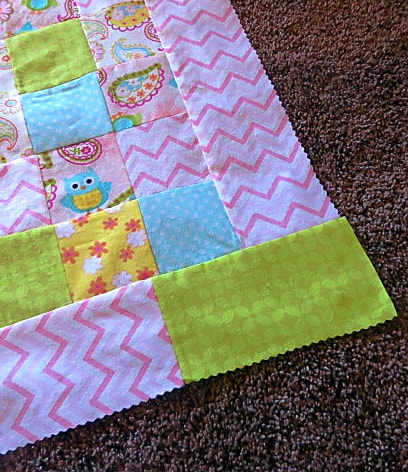
After finding a pattern I liked, I sewed the squares together first in rows, then in strips together.
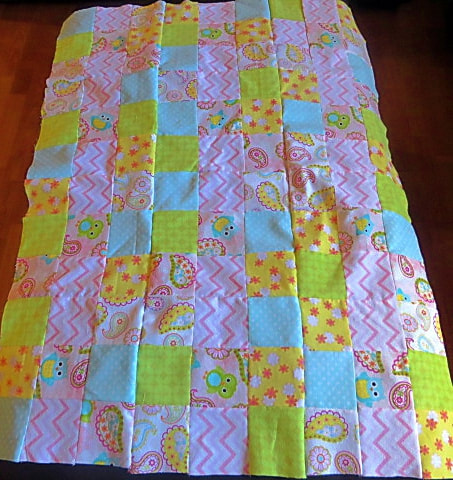
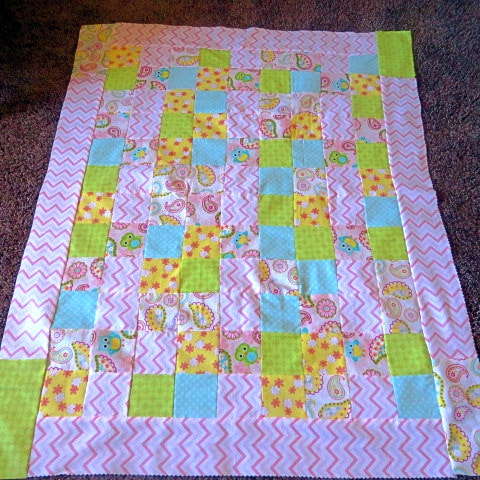
I liked it, but I decided it needed a border to finish the look and to make it a little larger. (Don't forget to press it flat.)
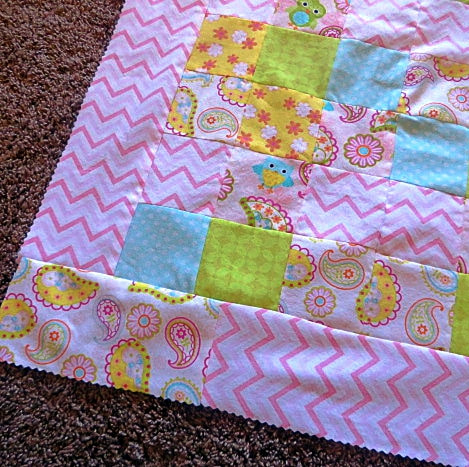
I didn't have enough fabric of any one pattern to make the border, so I pieced it using the zig-zag pink with a green and paisley in the corners. I fell in love with it.
Instead of using batting in this quilt, I used fleece as the backing and tied it together The fleece is so soft and warm. Tied with the top on it, I didn't feel it needed any batting. This baby going to live in California, not Alaska.

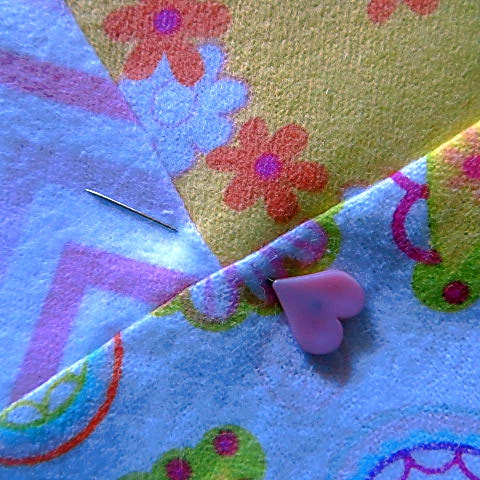
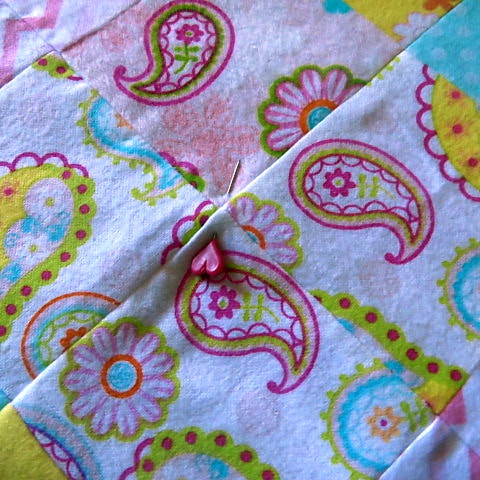
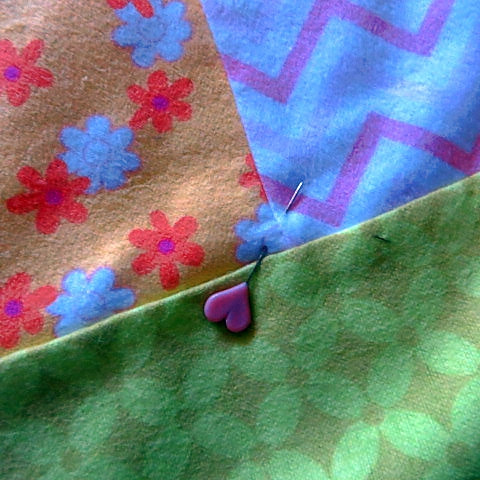
I decided that I would self finish the edges by turning up the backing to the front of the quilt. So, I cut the backing wider all around. Then, I pinned it into place, placing the pins where I wanted to tie it.
I love my little heart shaped pins against the sweet flannel fabric. It just adds to the joy I find in making projects like these.
I tied the quilt with 6 strand embroidery floss. I used a light pink. Of course, You will use whatever matches your fabric choices. 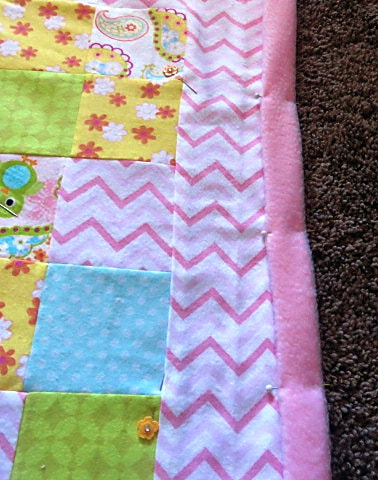
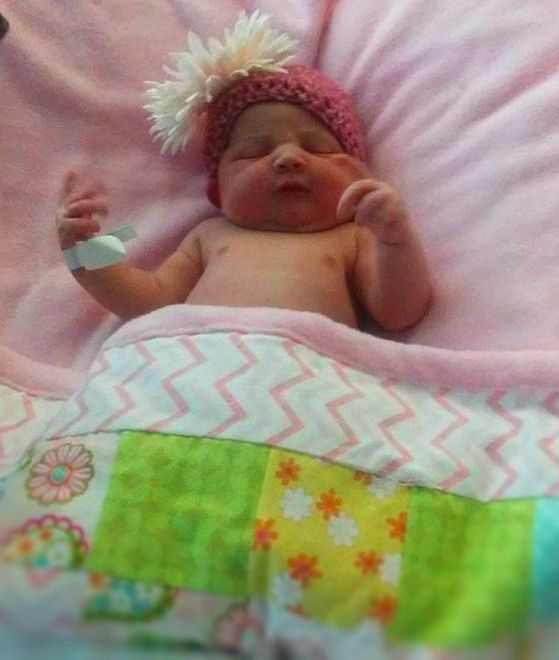
This photo was taken before the quilt was tied. I just wanted to see how it would look. I can hardly wait to see little Sofia in it!
And here she is! Sorry about the photo quality, I had to take it with my phone! But, she is a beauty.
|
Creators of Hot Cocoa Bombs! (copyrighted)

Author
Helen Reynolds: Mother of six children , grandmother to eleven! I love to cook, craft and create things and I especially love doing that with my family, So, when my lawyer daughter, Lindsey, my artist daughter, Madalynn, and I came up with the idea of Hot Cocoa Bombs, this blog was born. Then, one more daughter, with her technical and science skills, plus creativity has joined in to round us out! Read more about us here! 
Click this link and visit 3WinksDesignShop on Etsy. Find our Hot Cocoa Bomb Idea Book, our For the Love of PIe e-book and more of our creations!

Amazon Gift Cards are the Perfect Gift!
    Archives
June 2024
|


 RSS Feed