|
This post contains affiliate links. I will be compensated for purchases made through those links at no additional cost to you. All views expressed are my own. Thank you for your support!

You may remember reading about the giant zucchini I had growing in my garden when I came home from my recent trip to California. Here is a reminder:

Generally, zucchini that large aren't as good to eat as their smaller versions are. So, I decided to dehydrate this one and try my hand at making zucchini flour!
My friend Rhonda, who is my go to fountain of knowledge, told me about having read about zucchini flour and when I looked it up, I was intrigued, so I had to give it a try. Then, I found out that Anita, my other go to fountain of knowledge, had been making different types of vegetable flours for quite some time! Have you guys heard of it or tried it? Tell me about your experience in the comments! It took me two dehydrator loads to get this giant thing totally dehydrated. 
Of course, they started out as much bigger slices than this! Shrinkage happens in the dehydrator.

I also included a little yellow squash in my dehydrator loads.
After I had completed 2 loads, I decided to blend the squash into flour using my food processor. The idea of using zucchini squash flour is not to completely eliminate the regular all purpose flour, but to use less of the all purpose flour and add the zucchini flour as a replacement. So, when my blending of the squash yielded 1/2 cup of flour, I decided to go with that for my first try. Click on the pictures below to get more information.
I probably could have put the larger bits into the bread because it should rehydrate in liquid, but for this first time, I wanted the flour to be as fine as possible.
Now that I had this 1/2 cup of zucchini flour, I decided to adapt a zucchini recipe that I have to use the zucchini flour to make zucchini bread! This recipe makes two loaves and I have to say that this is the BEST zucchini bread that I have ever eaten! The texture is perfect, moist but not too moist. The flavor is amazing! I may have eaten half of the first loaf by myself. I don't know if it would have been this fantastic without the zucchini flour added to the recipe, but I'm going to start dehydrating more of my over abundance of zucchini to make it again! I also think that since the zucchini was fresh from my garden, the flavor of it was better to begin with. Finally, I believe the addition of the almond flavoring, though the almond flavor isn't that noticeable, really enhanced the flavor as well. All in all, this bread is terrific! *Side Note: I made this recipe again, without the zucchini flour because I hadn't gotten any ready yet. The bread is still delicious. So, if you don't have zucchini flour, you can still make it! 

If you have an over abundance of zucchini in your garden, this is a great way to use it and store it for future use! Just use a vacuum sealer or O2 packets to keep the moisture out. You can also make flour out of other vegetables in the same way. What a great way to sneak in veggies into your family's diet!
Other Zucchini Recipe Posts
0 Comments
This post contains affiliate links. If you make a purchase after clicking them, we will be compensated, but there is no additional cost to you. All opinions expressed are our own. Thank you for your support.  Let me begin by saying, that this recipe was inspired by my friend Rhonda who brought me a jar of preserved lemons. We have a mutual friend with a lemon tree. We were both the lucky recipients of many of those lemons this year. Rhonda decided to try her had at preserving some in salt and lemon juice, a process that I had never heard of and I am fascinated by it! But, now that we have the lemons, we need the recipes to use them in.
This post contains affiliate links. If you make a purchase after clicking them, we will be compensated, but there is no additional cost to you. All opinions expressed are our own. Thank you for your support.

My 10 year old, almost 11, granddaughter asked me one day if she could do something for the blog. I love that she wants to do something on here and that she reads the blog! I have given my grandchildren an opportunity to work on the blog a bit and earn some money, so I am guessing that was part of her motivation. So, I told her to come up with an idea and to let me know what is was. In just a few minutes she called me and said that she could make Brookies! That sounded like a great idea, so I let her run with it.
With help from her 13, almost 14 year old sister, she made a video of the Brookie making process. When you watch the video, you will hear Jayda's big sister helping her along and teasing her as well while she did the filming. They sent me all of the clips, (tons of them, out of order), and I edited them into a cute baking video. Watch carefully and you will hear some great baking tips from a precocious 10 year old, and see a few cute mix-ups as well. I just adore this girl! Now that summer is here, cooking with your kids, (or grandkids), is a great activity. It helps them learn a good life skill as well as practice math and reading skills. In the video, you will hear Jayda practicing her fractions, especially! I am so impressed at how skilled she is becoming at baking at such a young age. I am in AZ and she is in WY, so I wasn't there to help her. Her big sister was there to give tips, but mostly Jayda did this all on her own. By the way, if you don't know what Brookies are, they are a combination of brownies and chocolate chip cookies that are to die for! You can find recipes for them all over the web, or, you can do what I did and use a brownie mix you already love and top it with your favorite chocolate chip cookie recipe. Watch the video, and Jayda will give you the recipe that she used as well as variation ideas. Please comment below and let the girls know what a good job they did, both with the baking and the filming! Also, let us know if you or your kids try your hand at baking Brookies! These things are so good that I've even found an Ice Cream flavor in the store called Brookie! It is great! Hmmm, a scoop of ice cream on top of your home baked Brookie sounds like a great idea!
We've cooked with kids in other blog posts as well! Check these out!
This post contains affiliate links. If you make a purchase after clicking them, we will be compensated, but there is no additional cost to you. All opinions expressed are our own. Thank you for your support.
I've made no secret about the fact that I am loving my little urban garden this year. It has produced well and I have been having so much fun with it and dreaming and planning how I will make it even better next year.
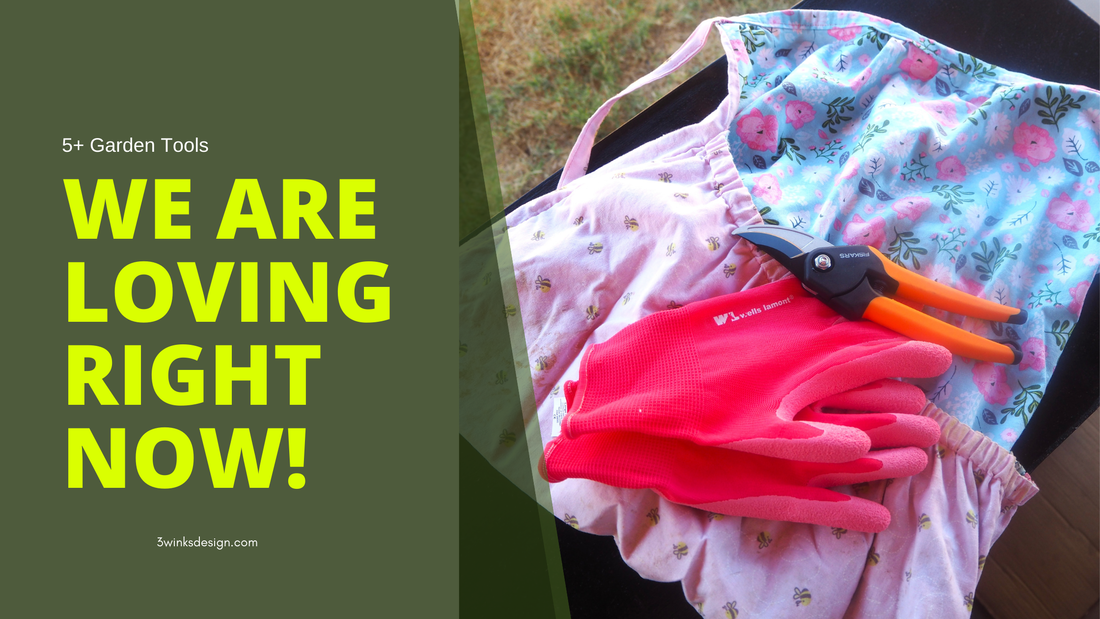
Anything that anyone pursues is always much more enjoyable if you have the right tools for the job. One thing that I have already shared this year is my harvest apron that I sewed up to wear to keep my hands free as I harvest the food from my garden. You can see how I did it on this post. Today, I am going to share with you a few more tools that will make gardening more enjoyable and just a bit easier on your hands. 
My husband picked me up these Fiskars Garden Shears at Lowe's the other day! You can also order them on Amazon. (the link is to Amazon) They are so nice to have when I'm reaching deep into a plant to harvest a zucchini or to prune some damaged leaves. Clipping is much better for the plant than just ripping something off of it. Just be sure to watch what you are cutting. (I accidentally snipped off some green strawberries the first time I used them! Oops!) I've been needing and wanting these for awhile. I'm so glad to have them!

My Wells Lamont Garden Gloves are just the thing to protect my hand from the prickly leaves and stems of some plants. Squash plants especially tend to poke my hands and there is no getting around lifting those big leaves to find the zucchini and yellow squash. These gloves were easy to work in and not clumsy feeling at all. I was able to used my shears while wearing them with no problem.

I just ordered myself these terra cotta watering spikes to use in my garden while we go on vacation for a week. Alicia tells me that they work great and so do the reviews on line. A week in Phoenix heat will give them a true test!

I picked up this watering timer at Walmart for my front flower/vegetable bed early this year. It has been a life saver. I should get one for my back garden, but I haven't yet. That is why I ordered the watering spikes. You can find similar ones on Amazon.
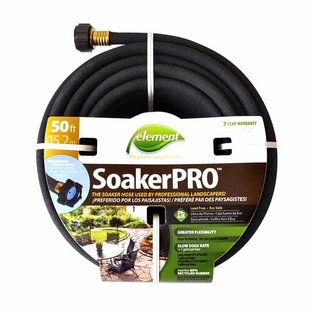
Going along with my timer, is my soaker hose. The great thing about the soaker hose is that I can move it around as I take out and put in new plants. It is very easy to do and I can place it right at the base of the plants where the water is needed. This one is from Walmart. Walmart has the best price on these that I have found.
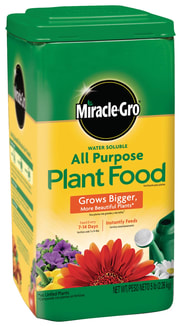
Finally, don't forget to feed your plants once a month! Lindsey and I have found that Miracle Gro does such a great job! My plants have never been healthier than they are this year and I have been using Miracle Gro religiously!
Two more favs that are less about products and more about DIYs that work against pests:
There you have it! Our current garden favs! If you have anything to add, please let us know and we will add it to our list of things to try! Happy Gardening!
Other Gardening Posts:
|
Creators of Hot Cocoa Bombs! (copyrighted)

Author
Helen Reynolds: Mother of six children , grandmother to eleven! I love to cook, craft and create things and I especially love doing that with my family, So, when my lawyer daughter, Lindsey, my artist daughter, Madalynn, and I came up with the idea of Hot Cocoa Bombs, this blog was born. Then, one more daughter, with her technical and science skills, plus creativity has joined in to round us out! Read more about us here! 
Click this link and visit 3WinksDesignShop on Etsy. Find our Hot Cocoa Bomb Idea Book, our For the Love of PIe e-book and more of our creations!

Amazon Gift Cards are the Perfect Gift!
    Archives
June 2024
|


 RSS Feed