|
This post contains affiliate links and we will be compensated for any purchases you make.

Part of the fun of fall is all of the cute fall porches people set up. Small touches really add a lot of festivity to a home. Unfortunately for some of us, we don't have a lot of room to work with. Maybe you live in an apartment or like us, just don't have very much porch space. If that's the case, I have come up with four ideas that you can use to really bring the festivity of fall to your doorstep.
The first idea is this super simple DIY to display your house or apartment numbers. Simply gather a fake pumpkin, a paint pen, and a stencil of the numbers you will need. I created mine using microsoft word and an exacto knife. Secure the stencil to the pumpkin and trace the numbers. When I did this, i thought it was easiest to fill them in without the stencil still in place, but do it however you find easiest. I also painted the stem of my pumkpin to match the numbers. Once finished, you can use a sealing spray to seal it all in before displaying it. This is perfect for a small space because it can be easily displayed in a window sill, as shown. No porch space is taken up!

A really easy way to add that fall touch to your porch is through fall foliage. Fake flowers can be inexpensive, they never die, and they add plenty of color and interest to any fall display. You can have as many or as little as you'd like, and you can really put them anywhere. Pots can go in a window sill, on the ground, or you can grab one that hangs from the ceiling. But anywhere you put them, they will look beautiful and festive.
Make your entrance more fall appropriate and welcoming by adding a wreath or cute sign. In an older post, I showed you how to make this rustic fall wreath. If you don't have time to DIY one, a cute sign can definitely send the message. We put this owl one out every year! It takes up no space on the porch, so it's perfect for an apartment or small space.
The last DIY is this sign I made that says "Harvest". I've seen this in a couple different places and thought it would be perfect for my porch set up, so I had to make it. For this you will need a large piece of wood, at least two different colors of paint, and a stencil for whatever you would like your sign to say. This stencil was made much in the same way the one for the pumpkin was. Before any painting, be sure to sand the wood on both sides and on the edges to avoid any splinters! Then paint on your base coat and use the stencils to paint on the words. I found it was easiest brush on the base coat and then use a sponge for the stencils. I stopped here, but if you wanted to do a light sanding after the paint is dry to make it look more aged, that would also be incredibly cute.
I love the way this project turned out and it only took about an hour to do. It doesn't take up too much space on the porch, but is an amazing statement piece (literally!). 
That's our fall porch this year. It's fun and festive, but so easy to produce and perfect for small spaces like ours. If you use any of our ideas, be sure to take a picture and share it with us on social media! Or if you have any of your own ideas, leave them in a comment down below. And keep an eye out for more fall fun from all of us here at 3 Winks!
-Madalynn 
8 Comments
This post contains affiliate links and we will be compensated for any purchases you make.  I told you I would be back with some more fall decor and here I am! Personally, I find decorating the outside of my house for each season and holiday to be more difficult than the inside. There's just a lot less space to work with and resources can be limited. You really need to be able to find ways to utilize vertical space. That's why wreaths are perfect! They take up virtually no space and just hang up right on your door, while still adding an adequate amount of festivity to your front porch. That's why today I am going to share two fun options for you to diy!  For both of the wreaths, I used wreath bases I purchased at Dollar Tree. For one of the wreaths you will need some fall colored raffia, which can also be found at Dollar Tree, as well as some Halloween or fall colored ribbon. You will also need some pine cones. I just picked mine up right off the ground and painted them brown with acrylic paint.  The first wreath is just a generally fall inspired wreath. I used the wooden wreath base and loosely wrapped orange raffia around the whole thing, adding a couple strands of pink and brown for variety and depth. The ends are just tucked up underneath pieces of wood.  Once the raffia was arranged in a way I liked, I used hot glue to attach the pine cones. I placed them in a way to even out the heaviness of the raffia. Raffia can be a little messy to work wit, but it is well worth it for the beautifully natural and rustic appearance it gives. This wreath will be perfect to keep up all fall long!  I made the second wreath very Halloween-centric, but if you'd like to keep it up the whole season it will look just as cute with general autumn colored ribbon. I began by wrapping black burlap ribbon around the foam wreath. For this project I decided to just use pins to hold the ribbon in place. This made it easier to adjust things to my liking as I went. So I pinned the black ribbon in place and then cut the orange ribbon into 9 strips. Spacing them out evenly, I wrapped the orange ribbon around the wreath in rings, pinning them in place. While the wreath is very cute just with the plain stripe look, I thought a nice bow would really complete the look. I made one out of the orange ribbon and used a pipe cleaner to attach it to the wreath. It's amazing what a difference a single bow can make! This wreath makes an excellent addition to any Halloween inspired porch. Making these fun little wreaths has definitely given me inspiration for some outdoor decorations, so keep your eyes peeled for some more diy fall fun! If you make any of our fall or Halloween crafts, be sure to post a picture and tag us on social media. Let us know in the comments which wreath is your favorite!

Ever since I purchased this pumpkin soup tureen, I have been waiting for the moment that I would be able to put my Vegetable-Ham Bisque in it. The color of the soup is perfect for this Autumn themed pumpkin tureen. It rained really hard on Sunday, and this week the weather is only getting into the 80's! The mornings and the nights are actually a little brisk! Plus, don't forget, I purchased these beautiful squash!

So, soup had to be made. (Well actually, I still haven't brought myself to be able to cut the carousel squash. They are so beautiful! But, see the butternut squash on the right in the back? I used it for the soup. (If Walmart is all out, here is a similar tureen. And, I may have to get these little covered soup bowls for myself! (Probably two sets. Maybe three. Wouldn't they be cute sitting on the table as the opening soup course?) And, oh my goodness! Lindsey would love this set of pumpkin serving dishes!
I digress, let's make the soup to fill the dishes, shall we? Start with the vegetables. I peel everything for this dish because I don't want any random peels in the final product. I use a potato peeler to peel even the squash! It works really well. Then you cut it all into chunks and put it in a large pot...

I usually make this soup when I have a left over ham bone. This time I didn't have one, so I bought a couple of ham hocks for about $4.00.

Oops! I almost forgot the onions! Also add the seasonings and then cover the entire thing with water and put on to simmer until everything is tender. This takes about 1/2 hour to 45 min. Your house will smell glorious!

When everything is tender, remove the ham bone and set aside. Puree everything with an immersion blender. Cut the ham bits from the bone and add back to the pot with 2 T. butter. Stir together.

Finally, you add cream to the mixture and simmer back to a serving temperature.

Isn't it beautiful in the tureen? This is only part of the soup. It makes a lot!

So much fun and fancy to use my tureen!

Click on the recipe for a pdf to print!

Goes great with crackers and I was thinking, even a grilled cheese sandwich.

I definitely need those little pumpkin bowls!
This is the time of year with all of the best holidays. Whenever I think of the holidays, I can't help but think of my sister-in-law, Geri. She loved the holidays, especially Christmas, so much. She had more Christmas decorations than you could shake a stick at. She even had Christmas silverware! I have to use the word "had" because our beautiful Geri passed away just a couple of weeks ago. She left my brother behind, not to mention all of her forty odd nieces and nephews, and the same number of Great nieces and nephews, and god children. Also her father and 5 of her siblings. She never forgot any of the holidays, including Valentines Day and Halloween. She never forgot a birthday. On all of their trips to Hawaii and anywhere else that she and my brother traveled, she sent them all postcards with different messages to each of them. Geri was devout in her religion and so kind and full of grace. We all miss her very much and morn for my brother who feels her loss so keenly. Another thing I think of during the holidays that came from Geri are some of the recipes that I routinely make now that she has been a part of our family for so long. (37 years!) She was always willing to pass her recipes along. Her Walnut Brittle is epic and the Portuguese Easter Bread from her family is amazing! So, today in Phoenix, it is finally cooler and rainy. Hurrah! Fall may be here at last! So, I made an autumnal dinner. (I just taught my kids at school the word "autumnal" and I think it is a cool word). I had some acorn squash and I roasted it with butter, brown sugar, a little salt, nutmeg, pumpkin pie spice, a little extra cinnamon and a sprinkle of sugar around the edges. I baked it for an hour at 425 degrees. YOU HAVE TO TRY IT! It tastes like pumpkin pie, without the crust and you get to call it a vegetable. 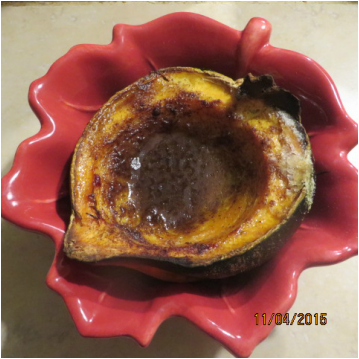 I think Geri would have liked it. She will be on my mind throughout the holidays this year and every year. I am so thankful to know that we will all see her again because of the Hope we have through the Resurrection of Jesus Christ. Because of Him, my heart is filled with love and peace instead of devastating sorrow. This is my first piece of Thanksgiving to share. I hope that all of you can feel His love and tender mercies in your lives as well.
|
Creators of Hot Cocoa Bombs! (copyrighted)

Author
Helen Reynolds: Mother of six children , grandmother to eleven! I love to cook, craft and create things and I especially love doing that with my family, So, when my lawyer daughter, Lindsey, my artist daughter, Madalynn, and I came up with the idea of Hot Cocoa Bombs, this blog was born. Then, one more daughter, with her technical and science skills, plus creativity has joined in to round us out! Read more about us here! 
Click this link and visit 3WinksDesignShop on Etsy. Find our Hot Cocoa Bomb Idea Book, our For the Love of PIe e-book and more of our creations!

Amazon Gift Cards are the Perfect Gift!
    Archives
June 2024
|


 RSS Feed