|
This post contains affiliate links. If you make a purchase after clicking them, we will be compensated, but there is no additional cost to you. All opinions expressed are our own. Thank you for your support.
I found this old post from and gave it a little update because I still love this idea!

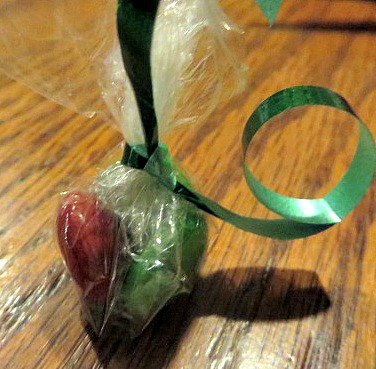
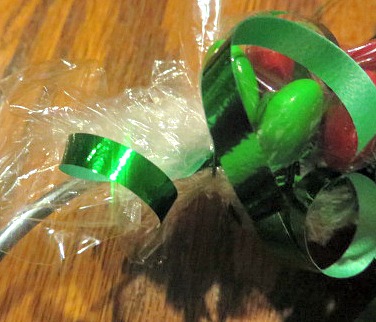
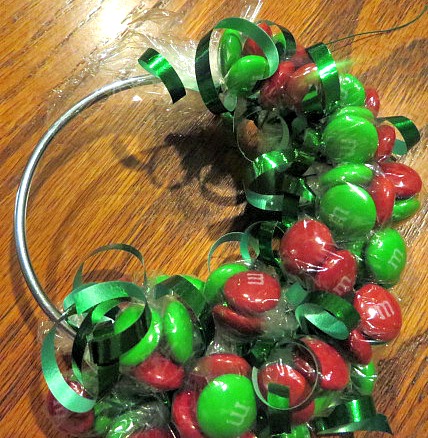
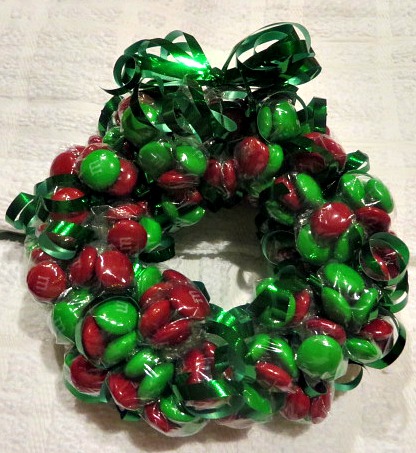
Once, many years ago, I made an M&M wreath by forming a wire coat hanger into a circle and then wiring little cellophane wrapped packs of M&Ms onto it. It was really pretty, but very time consuming and it took a lot of M&Ms. I have never forgotten it though and I sometimes consider making another one. Because of another project I am working on, I found myself with some extra 4" metal rings and I decided that maybe a mini-wreath would be an awesome little gift. I gathered my supplies to try it out.
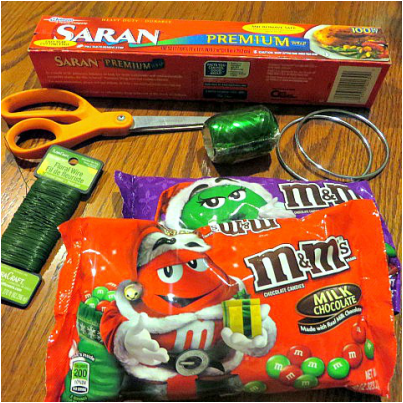
Some plastic wrap, ribbon, metal rings, floral wire, scissors and not nearly this many M&Ms, Christmas colors of course.
Click on the pictures below to learn the steps.
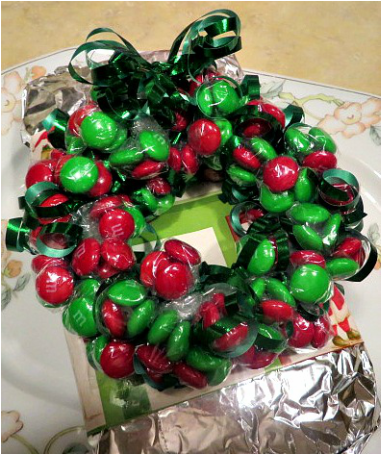
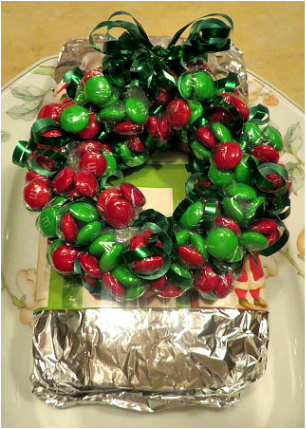
I baked banana bread the other day and decided to share some with a friend. I wrapped the bread in foil, put a band of gift wrap around it, then used the wreath on top as an extra treat! I think this is will be an appreciated gift, don't you? I hope so.
This is a project that would definitely lend itself to working with a group or at least a partner. Someone could cut the plastic, someone could fill them, someone could tie them Once you have a bunch of bundles, everyone could start wrapping. It sounds like a good family project to me!
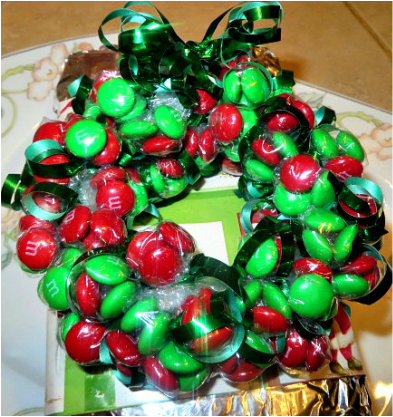
You could make a large one the same way. (Just put more candies in a bundle to make them bigger). But, I really like the small ones because the large ones start looking terribly shabby when you start cutting off the candy to eat! These little ones won't matter so much. Plus, they take less than a full 12 oz. bag to make so you can share the fun with more people. They are super easy to make, so go ahead! Give it a try.
Other Christmas Crafts You Will Love:

14 Comments
This post contains affiliate links. If you make a purchase after clicking them, we will be compensated, but there is no additional cost to you. All opinions expressed are our own. Thank you for your support. 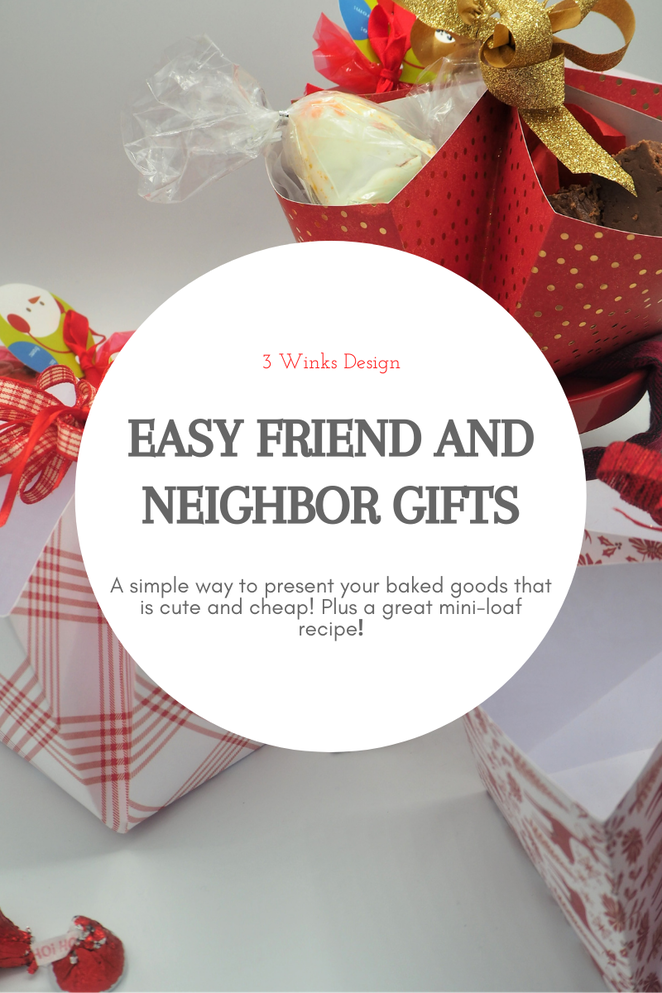 On my calendar of obscure holidays, I noticed that Friday is Make a Gift Day! Well, I've already been making gifts, but I took this as a challenge and decided to come up with something different to make. I perused Pinterest and as I looked through my own board of gift ideas, I saw this adorable treat basket that I had almost forgotten about! The directions for this basket made from 1 sheet of paper can be found on downhomeinspiration.com. 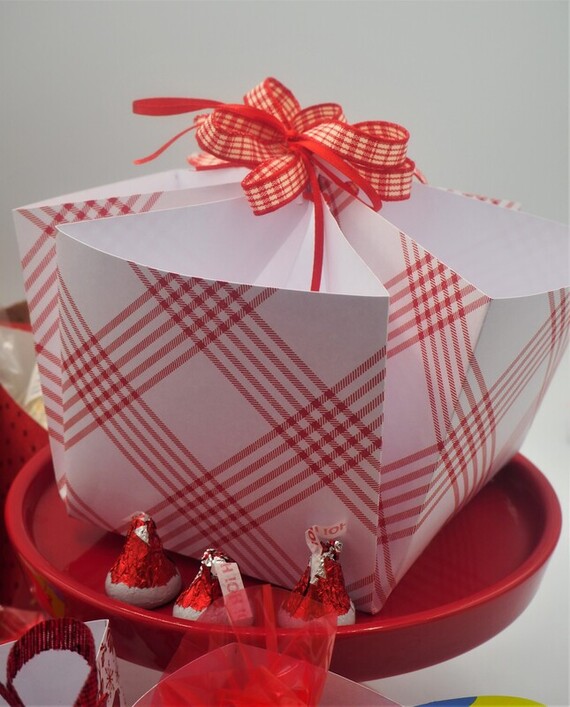 This basket is made so simply and inexpensively with 1 sheet of 12 x 12 decorative paper and some ribbon! You can use paper, or in my case I used decorative cardstock. And, because it is the holidays, I added a larger bow at the top! I love how these paper baskets turned out, and you can fill them with any treats that you would like! Kristen filled hers with mini-muffins. I thought that the 4 slots would be perfect for mini loaves of bread or different candies or cookies. 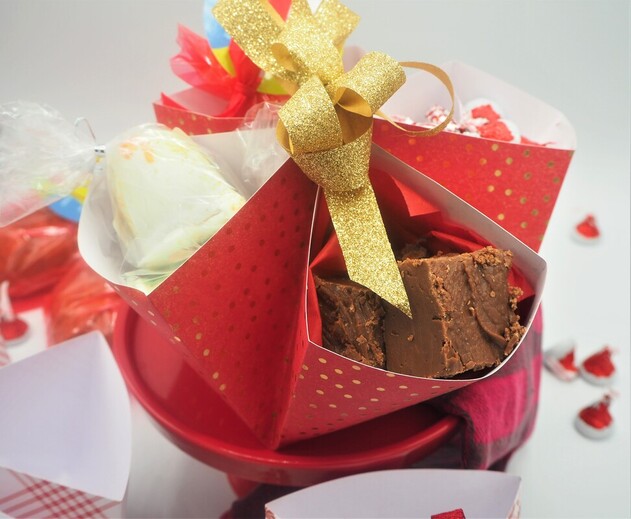 In the end, I ended up filling mine with fudge, a Pumpkin Gingerbread mini-loaf, Hot Cocoa Bombs and some Hershey's Kisses! (I feel like I copped out with the Kisses, but I didn't have time to bake the cookies that I had planned on.) But, who wouldn't love to receive a cute little basket filled with treats like this? Here are a few tips that I found when making the basket:
And one more idea, these would make adorable Easter Baskets in the Spring with pastel papers! Oh! I almost forgot! I wanted to share the Pumpkin Gingerbread Recipe with you! It is delicious! 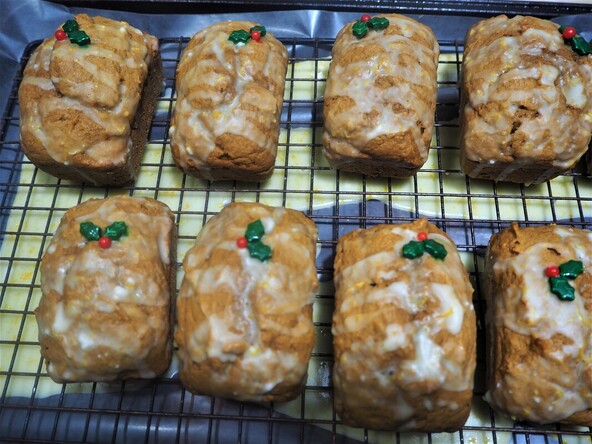 I baked these in the 8 cavity mini loaf pan that I have. You can purchase it here. Here is the recipe: 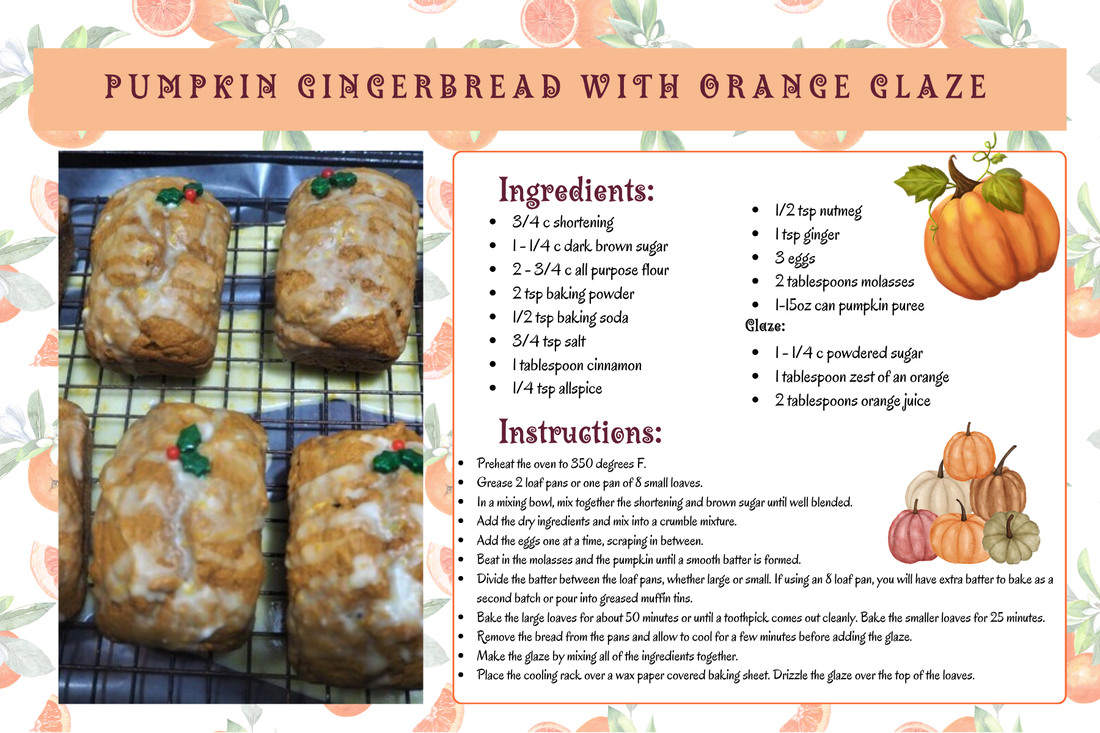 We wrapped them in little cellophane bags that came with to-from tags that will be great to write the recipients name on, plus the name of the bread! (I still think that 4 different mini loaves would be adorable.) I picked up my bags and tags after Christmas last year. But here is a sweet set on Amazon. I hope that you will try your hand at this cute little basket to fill with treats this year! What will you fill yours with? Here are some more ideas:
This post contains affiliate links. If you make a purchase after clicking them, we will be compensated, but there is no additional cost to you. All opinions expressed are our own. Thank you for your support. 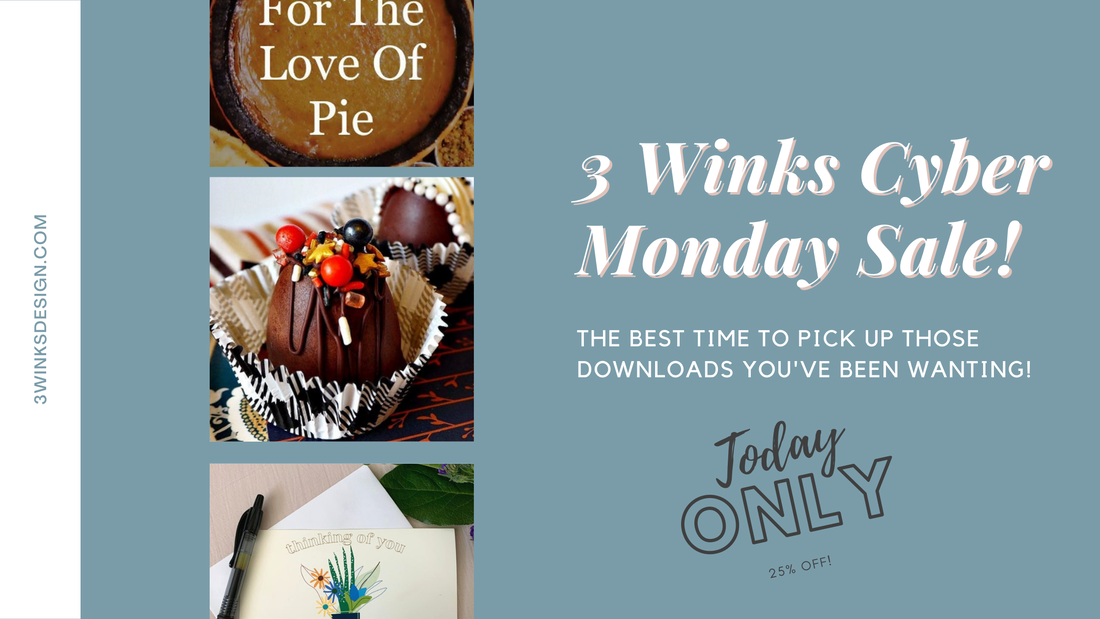 If you have been saving For The Love of Pie ebook in your cart on Etsy, or have really been thinking about getting one of the Hot Cocoa Bomb books from our Etsy Shop, there is no time like the present because today, November 29th, 2021, for one day only, everything in our shop is on sale for 25% off for Cyber Monday!
Other things you will find are cards, A Pandemic Advent Calendar that will work for anytime of the year, Adventures with Grandparents Posters or Booklets, Women in History Coloring Pages, and much more! Head on over and check it out by clicking on this link! Happy Shopping!
This post contains affiliate links. If you make a purchase after clicking them, we will be compensated, but there is no additional cost to you. All opinions expressed are our own. Thank you for your support.

This time of year, I really enjoy watching the Holiday Cooking Specials on TV. One of these is the Christmas Cookie Challenge with hosts Ree Drummond and Eddie Jackson on Food Network. This show brings together some really awesome cookie decorators who must bake delicious and beautiful cookies in order to win the competition.
I am not an awesome cookie decorator. But, when I saw one of the challenges was to bake puzzle cookies, I knew that it was something that I wanted to try! Puzzle cookies would make adorable gifts for friends, neighbors and grandchildren. As you can see in the above photo, I made a puzzle of Christmas Trees and Snowmen. You could make as many snowmen as family members and put a name on each one. This type of puzzle can be made as long as necessary. Maddy had the idea of making a wreath with ornaments that pull apart off of it for everyone to enjoy. This time, I stuck with this long puzzle. Here is how I did it: 
I rolled out my dough on parchment paper on the cookie sheet. I used cutters to cut out the shapes that I wanted to use and decided how I wanted the shapes to fit together. When I knew that, it was easy to use one cutter to make the cookie fit into the other. Do you see how the tree on the left looks like it is in front of the snowman to the left of it? I simply used the corner of the tree cutter to cut out a portion of the snowman so that they would fit together. I used this technique all along the row of shapes. Of course, you can make your cookies any shape you would like! There are endless options!
After they were cut out, I baked them close together so that they wouldn't spread to the point of not fitting together. (I saw a contestant use this technique on the show and it seemed to work for her!) I used this recipe because it doesn't spread too much when baked. I have had my collection of many different cookie cutters for years. But, if you need some great Christmas shapes. This looks like a great set. 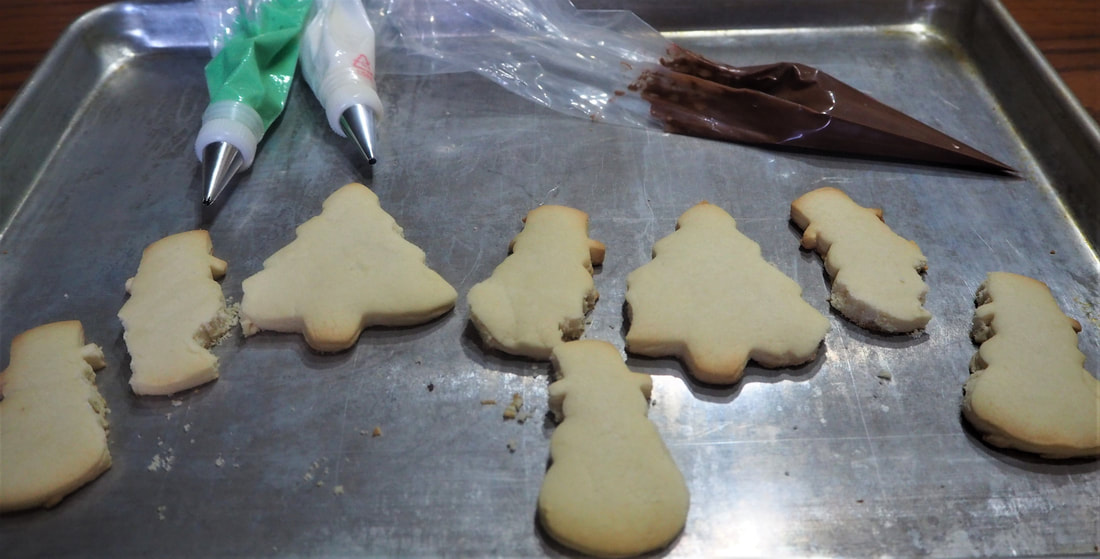
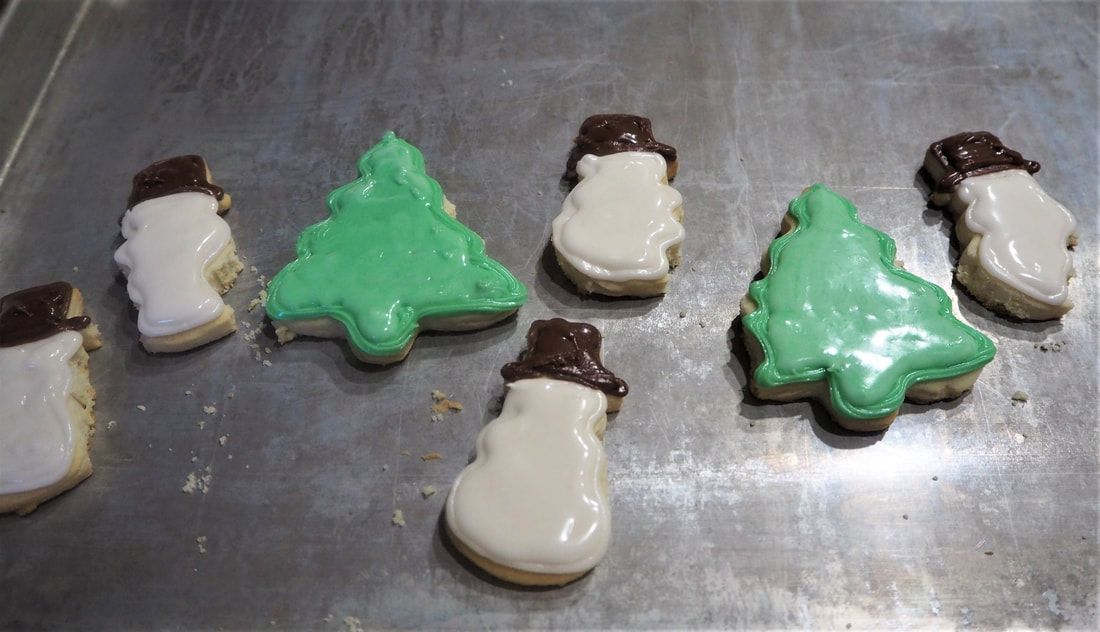
After the cookies are baked and you are getting ready to decorate them, use a sharp steak knife and gently break them apart. Try not to notice that I broke off a corner of my Christmas tree. I will disguise that with frosting.
Now you are ready to get your frosting ready and decorate! For the frosting, I forgo the meringue powder and use about 4 cups of powdered sugar, 1/2 c corn syrup and enough milk to get the consistency that you want. Plus, I flavor the frosting with vanilla or almond extract. Then, I divide it into bowls to make the colors that I need. For black, I usually use brown because I add cocoa to the frosting. It adds a little extra flavor and dimension to the cookies. Who doesn't like a little bit of chocolate on their sugar cookie? 
The first thing I do is outline the shapes so that I can flood them with a bit of thinner frosting.
Next, I flood them with the frosting. You will be surprised at how quickly this corn syrup type frosting develops a dried top, allowing you to pipe details on top of the flooded background!
Sometimes I pipe details and sometimes I use sprinkles. This time, I used both! 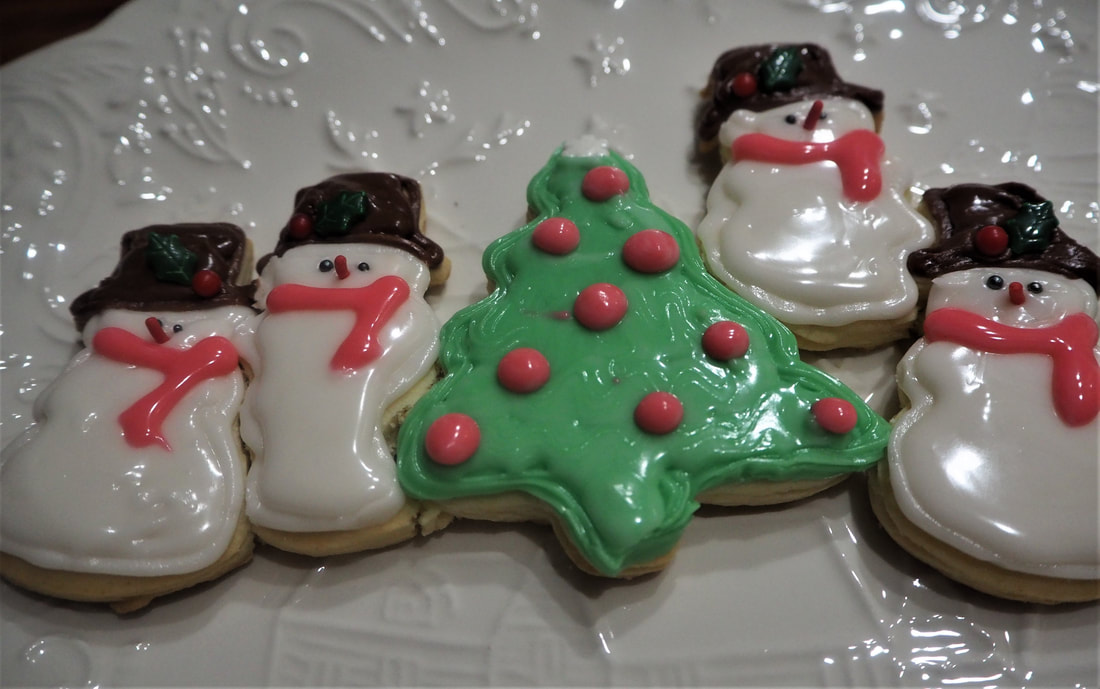
I told you that I'm not an amazing decorator, but I think that they look pretty cute! I piped on Christmas Balls on my trees, but topped them with a sprinkle star. I used sprinkle holly and berry on the snowman's hats, and sprinkle coal eyes, but I piped on the scarf.
These are something that my grandchildren will love! If I added a book about Snowmen, it would be an impressive little Christmas gift at the family Christmas party, or a centerpiece on the dessert table! It was a lot of fun to try. If you try your own version of a cookie puzzle, I would love to see pictures!
Other Cookie Gift Ideas We've Shared:
|
Creators of Hot Cocoa Bombs! (copyrighted)

Author
Helen Reynolds: Mother of six children , grandmother to eleven! I love to cook, craft and create things and I especially love doing that with my family, So, when my lawyer daughter, Lindsey, my artist daughter, Madalynn, and I came up with the idea of Hot Cocoa Bombs, this blog was born. Then, one more daughter, with her technical and science skills, plus creativity has joined in to round us out! Read more about us here! 
Click this link and visit 3WinksDesignShop on Etsy. Find our Hot Cocoa Bomb Idea Book, our For the Love of PIe e-book and more of our creations!

Amazon Gift Cards are the Perfect Gift!
    Archives
June 2024
|


 RSS Feed